May 2017
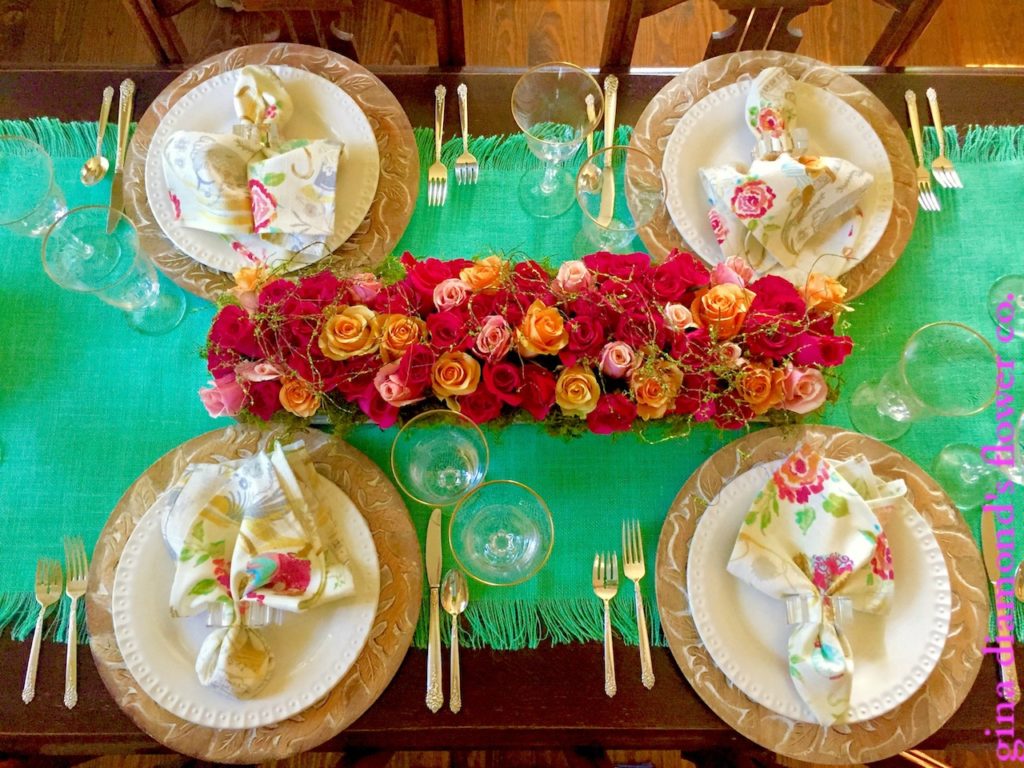
I arranged this pretty and colorful pavé style centerpiece for a garden party luncheon I hosted this week. Pavé is a French word meaning paved. The pavers on cobblestoned streets are set together very tightly and compactly, hence the concept of this style of flower arrangement. This tutorial shows you step-by-step how to re-create this long and stunning showstopper for your next gathering.

What you’ll need:
A low, rectangular planter, wet floral foam, plastic trash bag, plastic containers to fit inside the planter, a small plastic tub, floral preservative, a knife, roses, angel vine, moss …and, if possible, a furry assistant (you’ll see what we mean!).
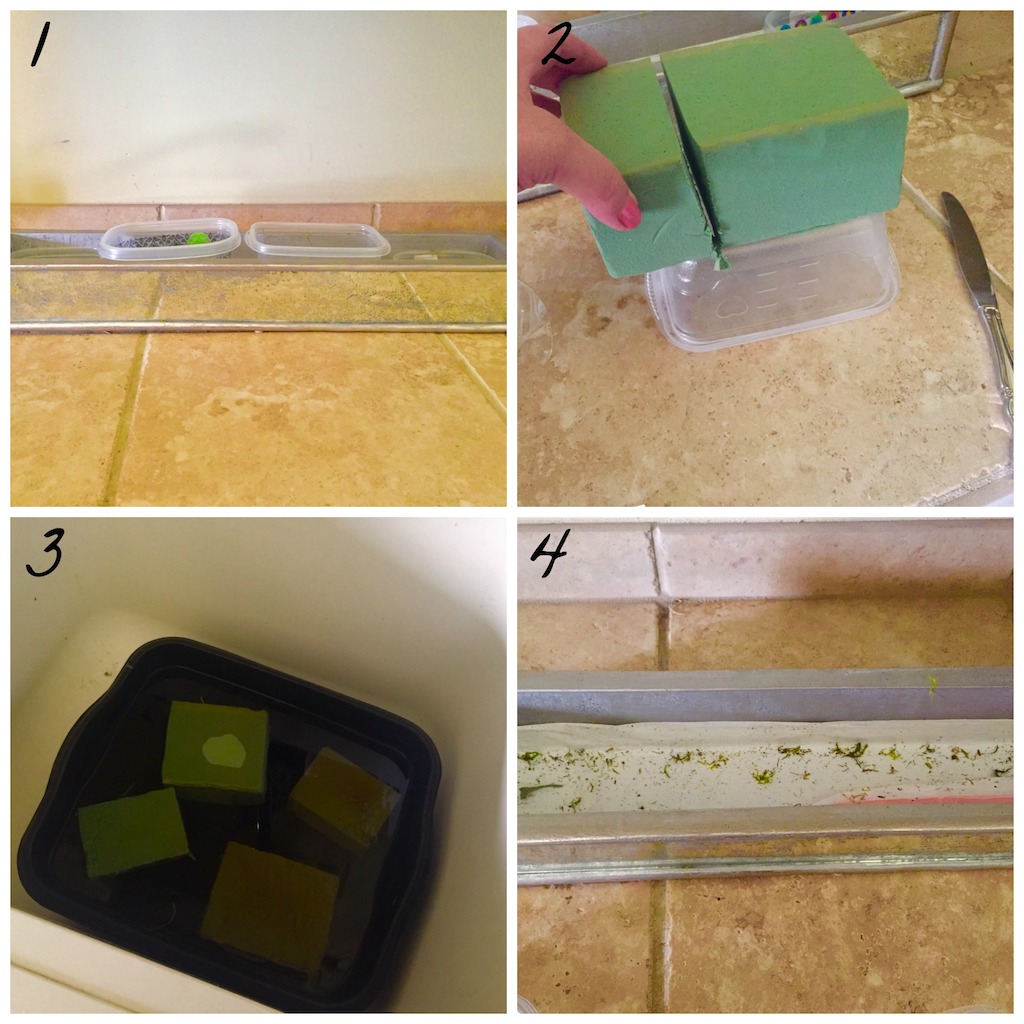
1. Select your container. For dining, your arrangement should be an adornment, not an obstruction. We chose this slender antique mirrored rectangular piece as our starting point. You could select a container of any material or length you like, just make sure to keep it low.
2. Cut wet foam to fit into the liner (a container that will be placed inside your rectangular vessel). As you can see, we used a dinner knife but anything long enough will work.
3. Fill a plastic tub with water and a packet of floral preservative (this usually comes with purchased flowers). Once container is full, drop the foam into the water and wait until it is completely under water. This takes about 30 – 45 seconds. Don’t press the foam down as this can create a dry pocket. There is also no need to let the foam soak for hours.
4. Line the container with a sheet of plastic to protect it from any potential moisture damage. We usually use trash bags for this.
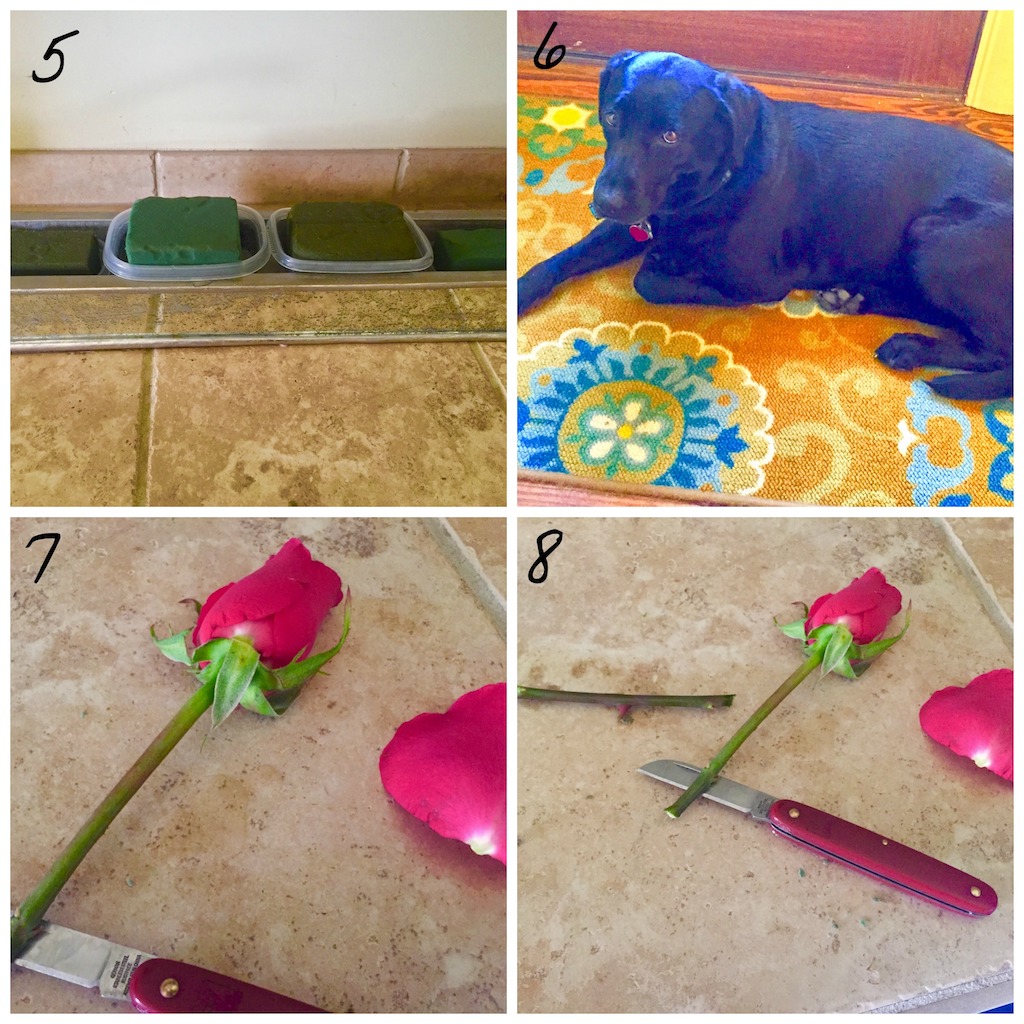
5. Place wet, soaked foam into liners and secure them into the planter making sure they fit tightly. We used simple food storage plastic containers for this.
6.It’s always a good idea to have a supervisor and Emma is doing a spectacular job sitting right in front of our work area.
7. Remove any petals that are torn or have large brown spots on them. Determine the height needed, making sure to leave enough stem for a two-inch insertion.
8. Go ahead, take the plunge and make the cut. The first cut is the hardest!
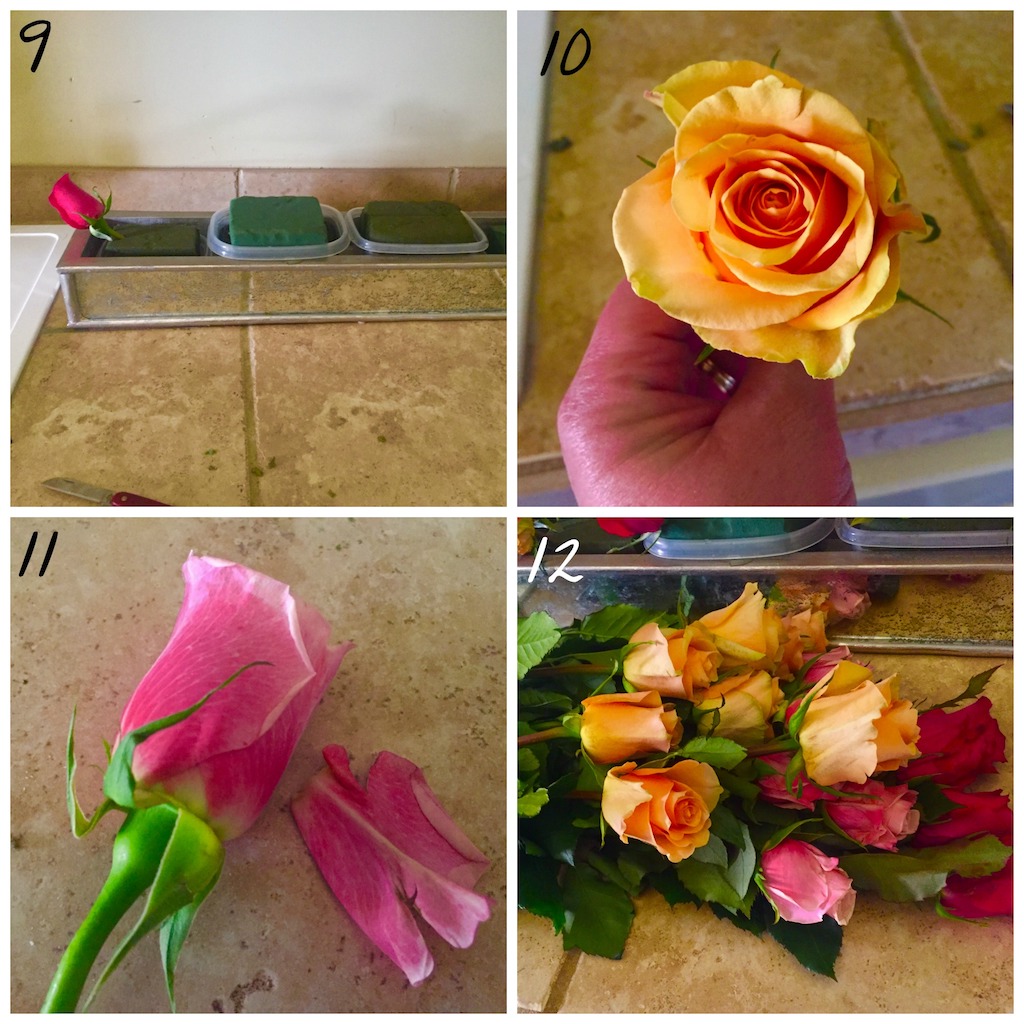 9. Begin placing flowers in pavé style. The idea is to cover your foam completely with roses, forming as level a surface as you can.
10. Take time to enjoy the beauty of each rose!
11. Continue to remove spoiled petals.
12. Look at the color combination you have selected and aim to distribute the colors around evenly.
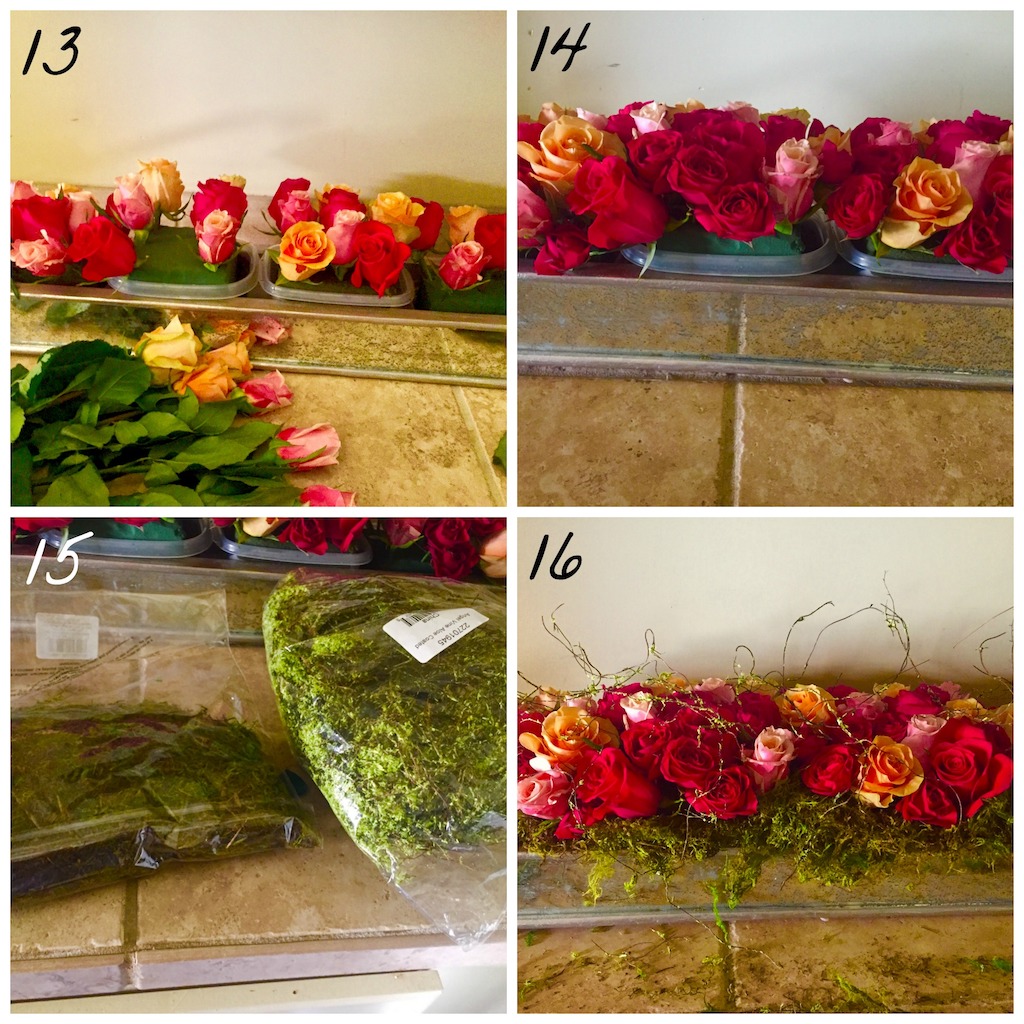
13. Continue placing the roses pavé style until they have all been set in place and most of the foam is covered.
14. Once all the roses have been set in place, it’s time to deal with the empty spots by covering all the mechanics of the arrangement.
15. Gather the moss and angel vine.
16. Push the moss under the flowers and a bit into the container. Top with sprigs of angel vine and voilà, you’ve made a beautiful pavé centerpiece!
