
January 2017
Last week I had the pleasure of attending the Farmer’s Table Cooking School in Livingston, Mississippi where we learned how to prepare a beautiful and very delicious vertical pear salad. As we were working with the pears, I kept thinking of how beautiful they would look in an arrangement. So,I went back home and created a vertical arrangement with pears that is stunning and easy to do.
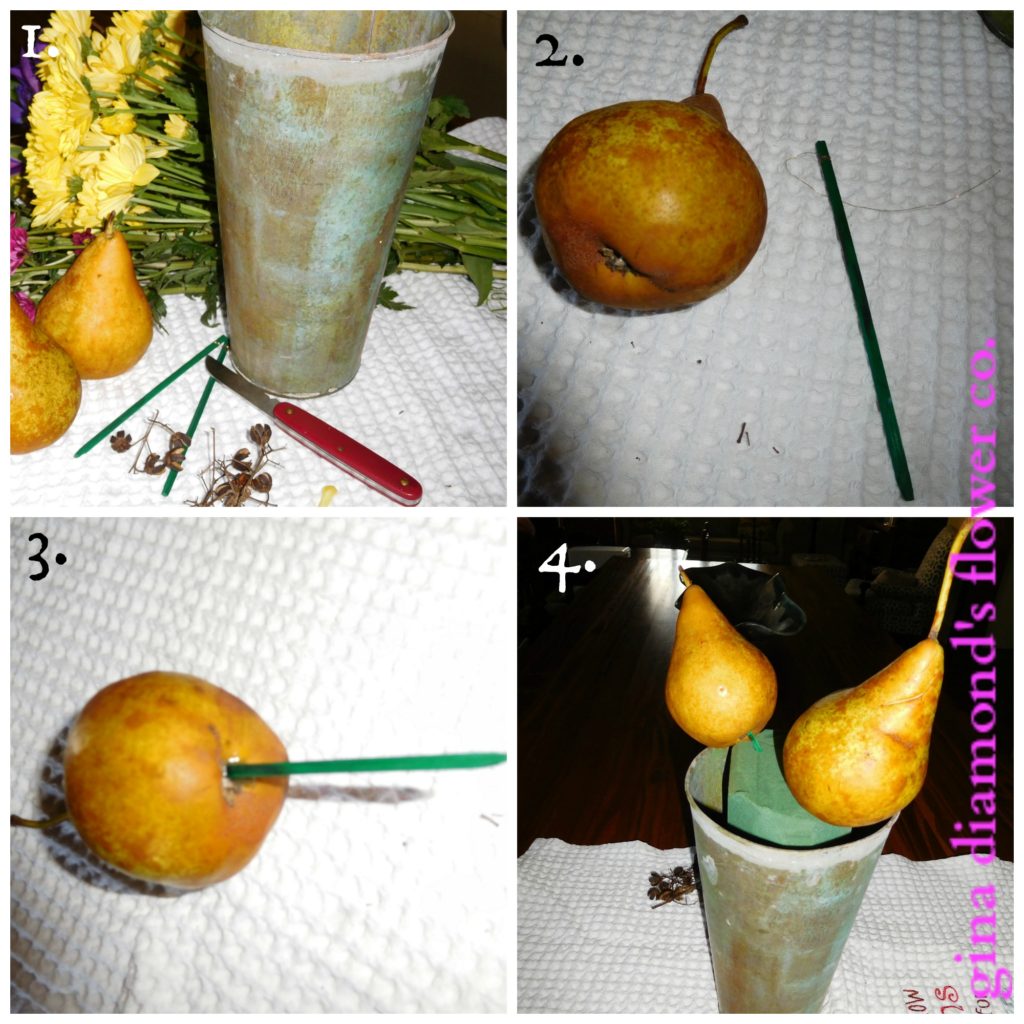
1. Gather supplies: vessel, wooden picks, pears, flowers, knife, floral foam and preservative. Cut the foam to fit your vessel. I use a butter knife when cutting floral foam. Make sure to soak it in water that contains preservative and don’t push the foam down into the water. Let the foam naturally soak in the water.
2. Once your vessel is properly prepared with the soaked floral foam, gather the pears and wooden picks.
3. Insert the wooden pick into the bottom of the pear leaving enough of the pick for securing into the floral foam.
4. Place the pears in floral foam trying not to go too far over the rim of the container. In vertical arrangements, all plant materials should remain as close to the container as possible. The height is the key feature in this type of arrangement.
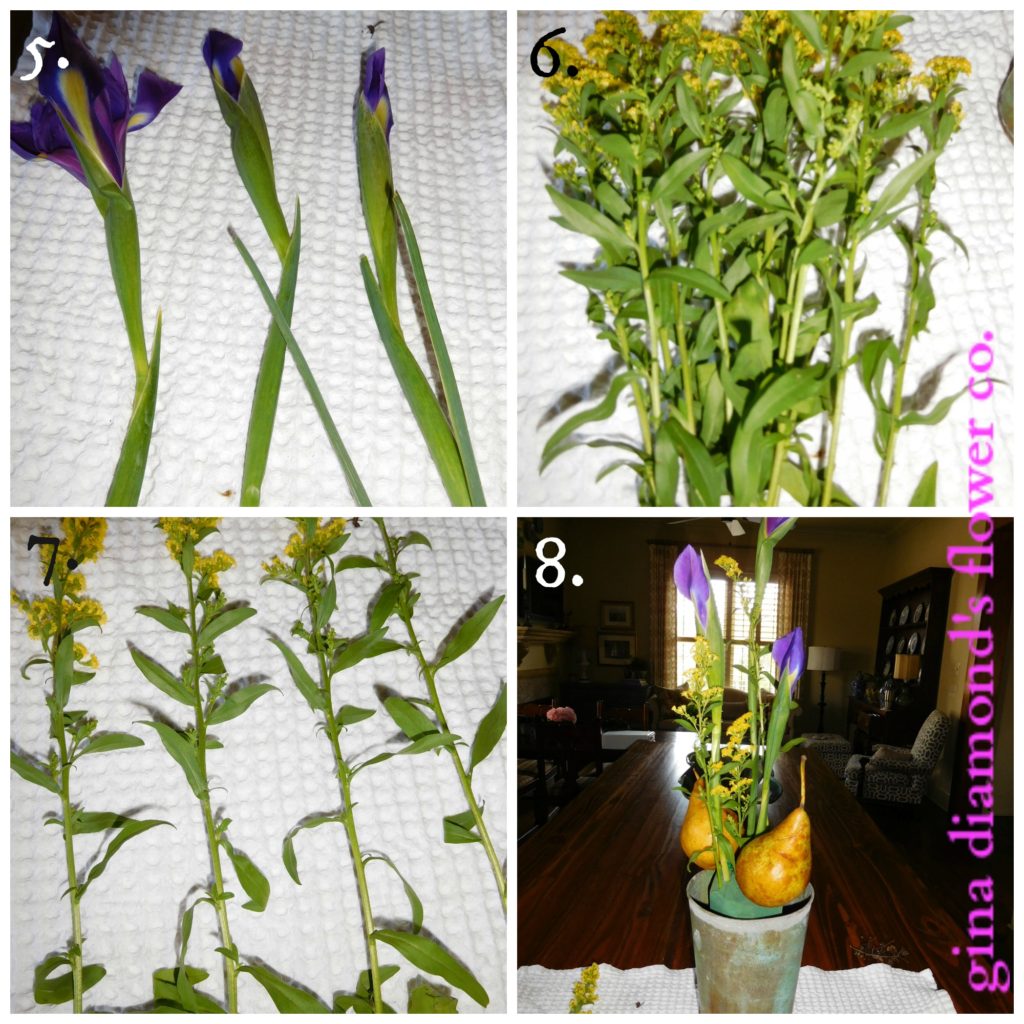
5. Start with the largest and tallest flowers; I used iris. Place three of them in a staggered fashion. Think about how they might grow in nature. In this type of arrangement, the height of the tallest flowers should be 1 ½ – 2 times the height of the container.
6. Add your next flower in the same staggered fashion as though they are shadowing the larger flowers. In this arrangement this flower is solidago.
7. If you used the solidago in its fullest form, it would not really work in a vertical arrangement. Pull some of the width off leaving the tallest stems for use in a vertical arrangement like this one.
8. Arrangement in process…
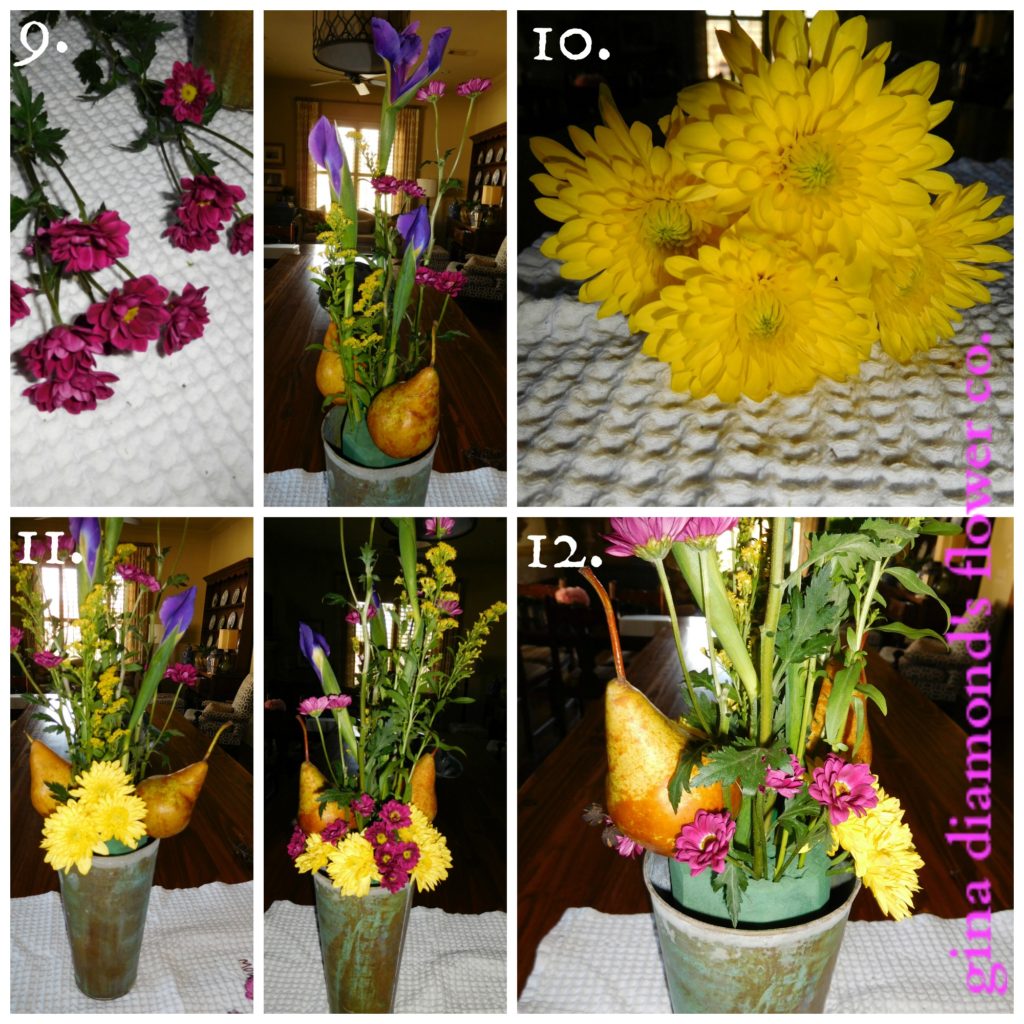
9. The poms also benefit from thinning out; leave the tallest stems for this arrangement. Place them to shadow the solidago.
10. These yellow poms have been pulled off the main stem leaving them with a much shorter stem to work with which is perfect for tucking them in under the larger flowers and around the pear.
11. Surround the yellow poms with the smaller purple poms clustered together. Again, these have been pulled off the longer stem.
12. While this type arrangement really is a front view design, the back remains important. If left empty it does not complete the whole design, so remember to work on the back in the same fashion as you did in the front.
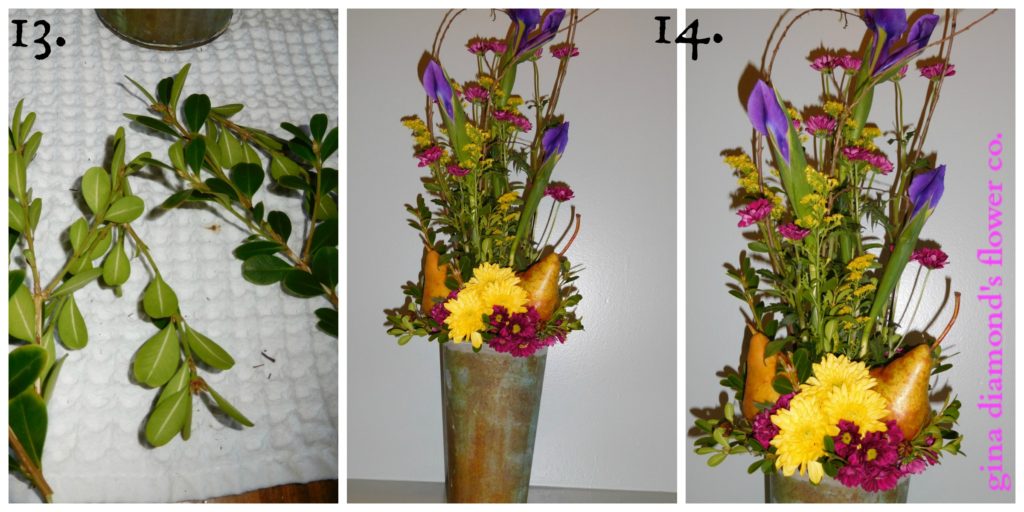
13. Using a bit of greenery can help hide all of the mechanics and add another texture.
14. And here we have our finished Vertical Pear Floral Arrangement. I always step back from a finished arrangement so I can see if any material needs to be added. In this case, I filled some empty spots with a few flowers and added some branches for interest. Taking a photo is another good way to see where empty spaces may be. I hope you give this arrangement a try for yourself. This works best with two colors of flowers. In this example, I chose direct opposites on the color wheel. Direct opposites usually work very well together in design.
